Workshop and Job Cards
The Workshop module in ROBOTILL allows you to 'book a job in' and then continue to work on the 'job' for any given time,
adding items (labor, parts, etc) as needed and then invoice the job once completed and the customer collects.
The 'job' is 'booked in' and invoiced from the ROBOTILL Retail Module. Adding items to the 'job' (labor and parts) is done
in a separate Workshop module. The ROBOTILL Workshop module can be used on the same computer (till) or a different computer
in the workshop itself.
To use the Workshop module on a different computer simply follow the instructions on how to install ROBOTILL on an additional computer.
The Workshop Module is part of the main install of ROBOTILL. To open Workshop click on the Windows start button and scroll down and expand the ROBOTILL program group.
You can add the Workshop shortcut to your taskbar if you want.
If a Deposit is Required
If you want to charge a customer a deposit when a job is started you need to create two Products (Stock Items).
- The Deposit Item called 'Service Deposit' or something similar.
- A 'Deposit Paid' item that will be added to the job card. The Deposit Paid item should be the same amount as the deposit item but a negative value.
The deposit payment is done as a separate sale before the job card is started.
The cashier can just take note of the Slip ID of the deposit to add a note to the job card of the payment.
Start a Job - Create the Job Card
A job is started (job card created) from the Retail POS module by starting a normal sale.
If a deposit was paid, add the 'Deposit Paid' item to the sale. Any other items that will be needed for the
job can also be added at this stage (more or all can be added in the Workshop module).
If a deposit was added, also add a note to the deposit item (Menu Button > 'Add Note to Sale Item')
and add the Slip ID.
If the customer hands in an item that needs to be repaired, you could add a product for that with a
zero value so that a note can be added as well. See example below.
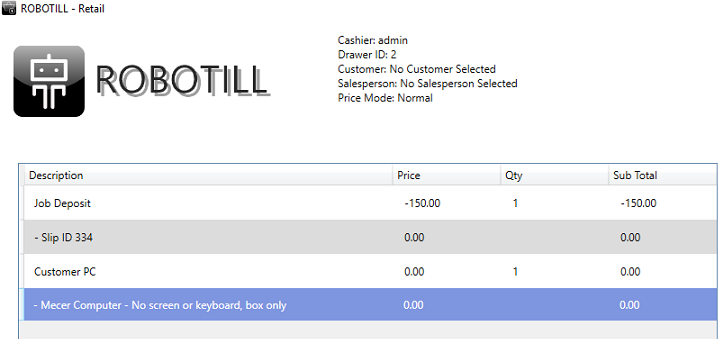
The job can then be created. From the Retail Module click on the Menu Button.
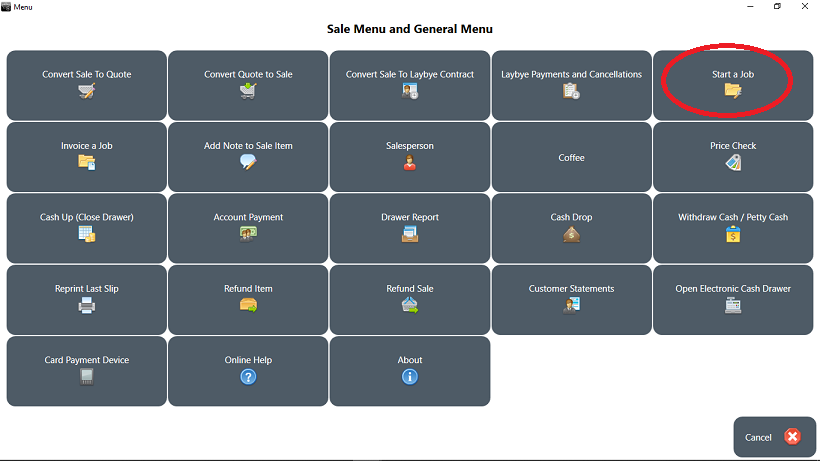
Click on 'Start a Job'. The sale will then be converted into a job and a 'Job Card' will be created.
You will be prompted to select or create a new customer. After the customer was selected.
You will be prompted to enter a comment for the job. The comment will appear on the job card and
also be visible when jobs are listed so that it is easier to select the correct one.
Two job cards will be printed, one for the customer and one for internal use.
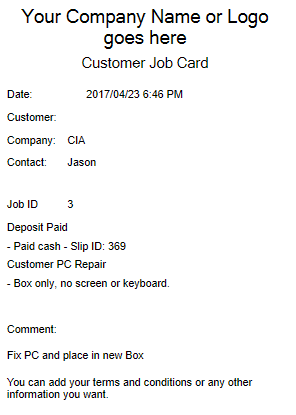
The job cards can be customized in the Print Design feature of ROBOTILL.
The job has been created and 'passed on' to the Workshop module.
Working on the Job
All Jobs in progress (Open Jobs) will be displayed in the ROBOTILL Workshop module.
The Workshop module can be opened on the same computer as the till (Retail Module) or on another computer
- in the workshop (on the same network).
The employee will need to log in to start working in the module.
A user for the employee can be created in Manager.
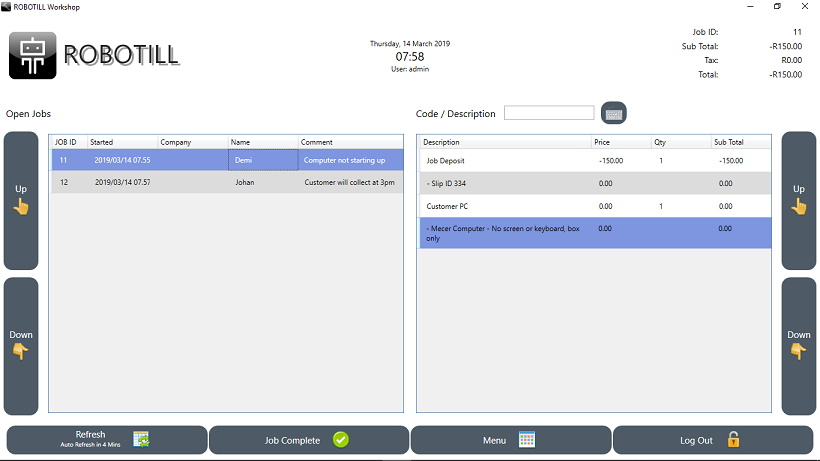
Select the Job in the left pane. The details of the job will be displayed in the right pane.
The comment, items and notes that was added by the cashier will be displayed.
Any work that is done - for example labour, parts, etc - can be added to the job by simply
scanning the item or typing the code or description. The user can also add notes if needed.
Labour for example can be set up as a measured item so that the employee can easily add the time worked to the job.
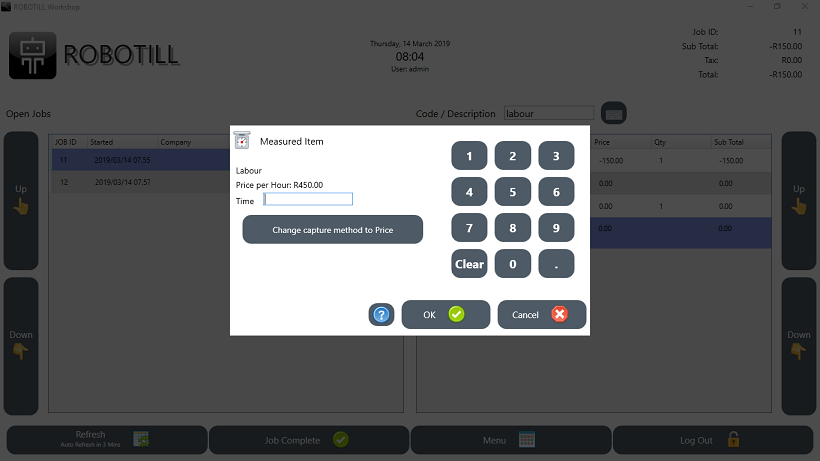
The job can be left open as long as needed. The workshop can also switch between jobs and keep multiple jobs open at the same time.
Once a job has been completed, the workshop can click on 'Completed Job'.
The cashier (Retail Module) will not be able to invoice the job before it is marked as completed.
Invoicing the Job
A job is invoiced (to complete and receive final payment) from the Retail module. From the Retail Menu
click on the Menu button.
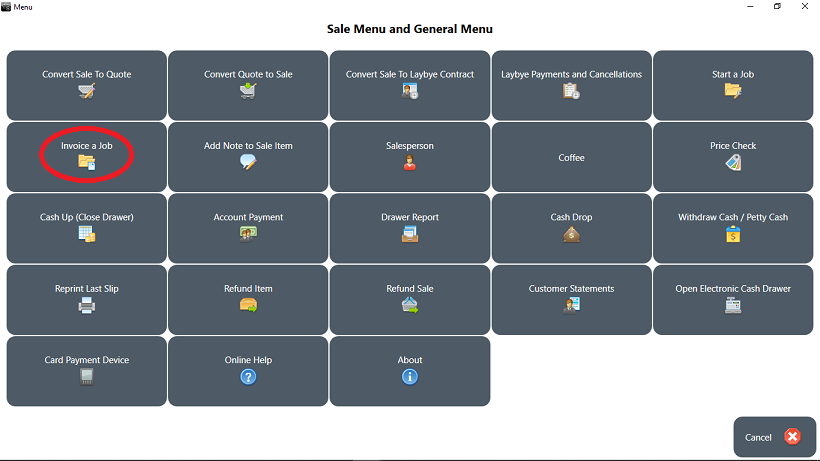
Click on 'Invoice a Job'.
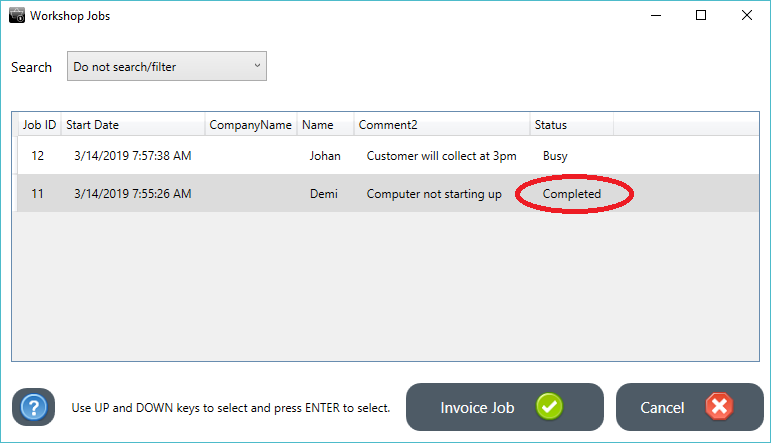
The jobs that are available to be invoiced will have a status of completed.
Select the job and click on 'Invoice Job'
The job will be converted into a normal sale that can be completed.