Stock Receiving
Starting the stock receiving process
Receiving stock NOT ordered from ROBOTILL
To receive stock that was not ordered via ROBOTILL, open ROBOTILL Back Office. Go to 'Home' > 'Products and Stock' > 'Stock Receiving'.
Click on 'New'.
Continue with 'Receiving stock with or without an invoice from a supplier'.
Receiving stock with or without an invoice from a supplier
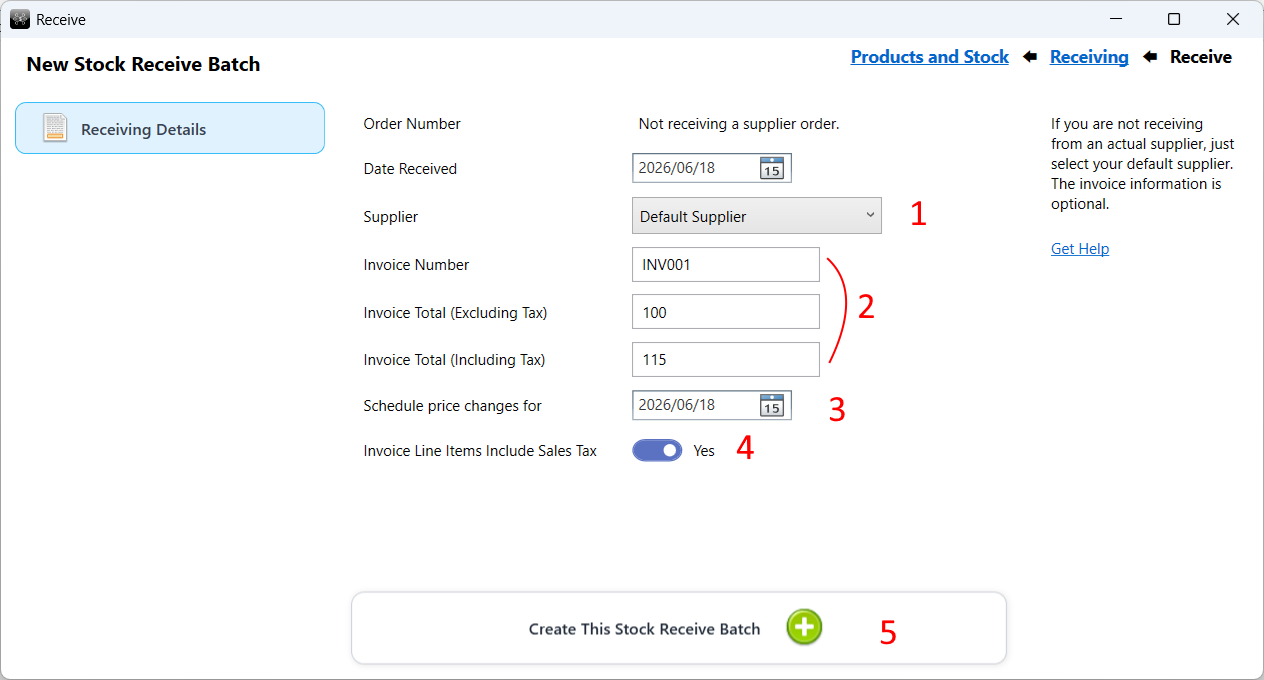
- Select the supplier you are receiving the stock from. The supplier is required,
so if you are not receiving stock from a specific supplier, just select your default supplier.
- If you do not have a supplier invoice you can leave the invoice details empty. If however you do have the invoice, enter the details as it will allow you to compare afterwards what you have paid for with what you actually received.
- If you will be making any price changes during stock receiving, you can choose when these price changes should be implemented.
- Invoice Line Items Include Tax: Set this option to No if the supplier is not VAT registered, or if sales tax is calculated separately and is not included in the individual line item prices shown on the invoice.
- Click on 'Create This Stock Receive Batch'
Receive the stock
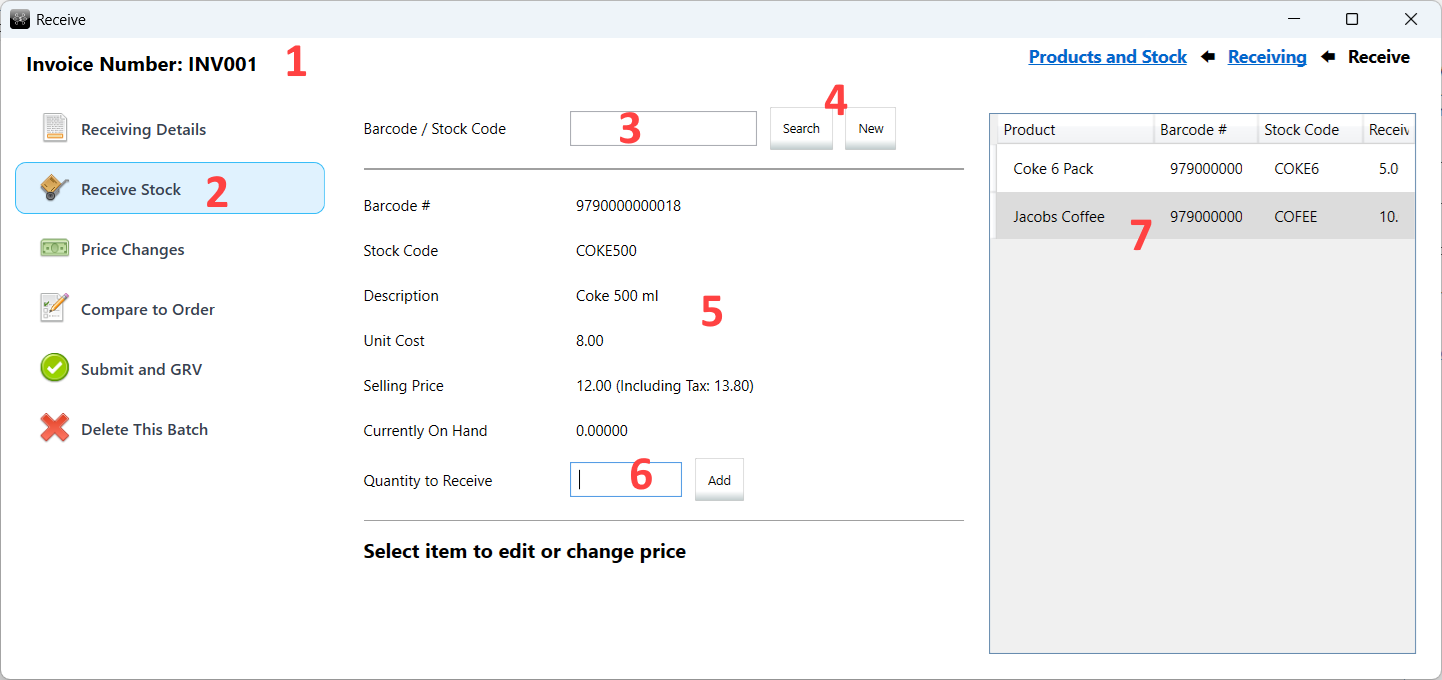
- If the newly created batch (or current selected batch) has an invoice number, the invoice number will be displayed. Otherwise, the system generated stock receive batch number will be displayed.
- Select 'Receive Stock' (it will be available once you completed the steps above)
- Make sure the barcode box has focus and scan the item you are receiving. Alternatively you can type the code and press ENTER.
- You could also search for the item if the code is not available or you can create a new product for this item.
- The selected item details will be displayed and the quantity box will receive focus.
- Enter the quantity you are receiving and press ENTER or click Add.
- The list of items already received will be displayed.
When you receive compound items or sub items for compound items, all stock counts will be updated
(for both the compound item and the sub items).
You do not need to complete the receiving of stock in one session.
You can close the stock receiving screen and return later to receive the rest.
Note that your actual stock counts will not be updated until you mark this batch as complted (see below).
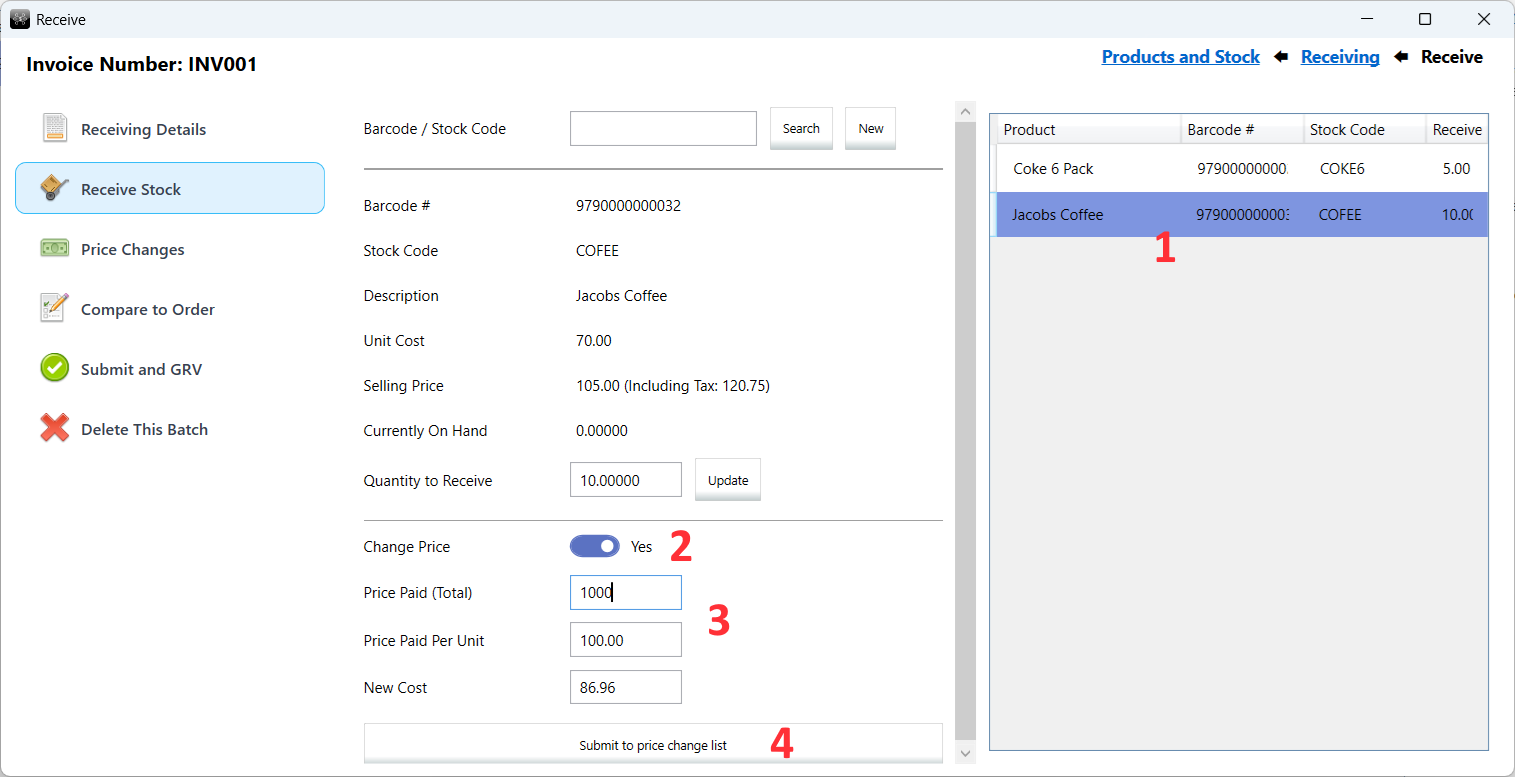
Changing Prices During Stock Receiving
If the supplier's prices have changed while you are receiving stock, you can easily update the product costs and selling prices.
-
To change the price of a received item, select the item from the received list on the right-hand side of the screen.
-
Enable Change Price.
-
Enter the price shown on the supplier's invoice. If the invoice displays a unit price, enter the value in
Price Paid Per Unit. If the invoice displays a total amount for all units received, enter the value in
Price Paid (Total).
The new calculated cost will be displayed automatically (see below for details on how the cost is calculated).
You may manually change the calculated cost if required.
-
Click Submit to Price Change List.
Note: Any affected products will also be added to the price change list. This includes sub-items and parent items.
For example, if you change the cost of a Coke 6 Pack, the individual Coke Can product will also be added to the price change list with newly calculated costs and selling prices.
How New Prices Are Calculated
The new product cost is calculated from the invoice price. The following settings are taken into account:
- Whether the invoice line items include sales tax, as selected for the current invoice.
- Whether product costs should include sales tax, as configured in Sales Tax Setup.
- Whether weighted costing is enabled in your Stock Receiving Settings.
If you have enabled automatic selling price calculations in your
Stock Receiving Settings,
ROBOTILL will also calculate new selling prices for the product and any affected items.
The selling prices are calculated using the new cost and the current markup configured for each product.
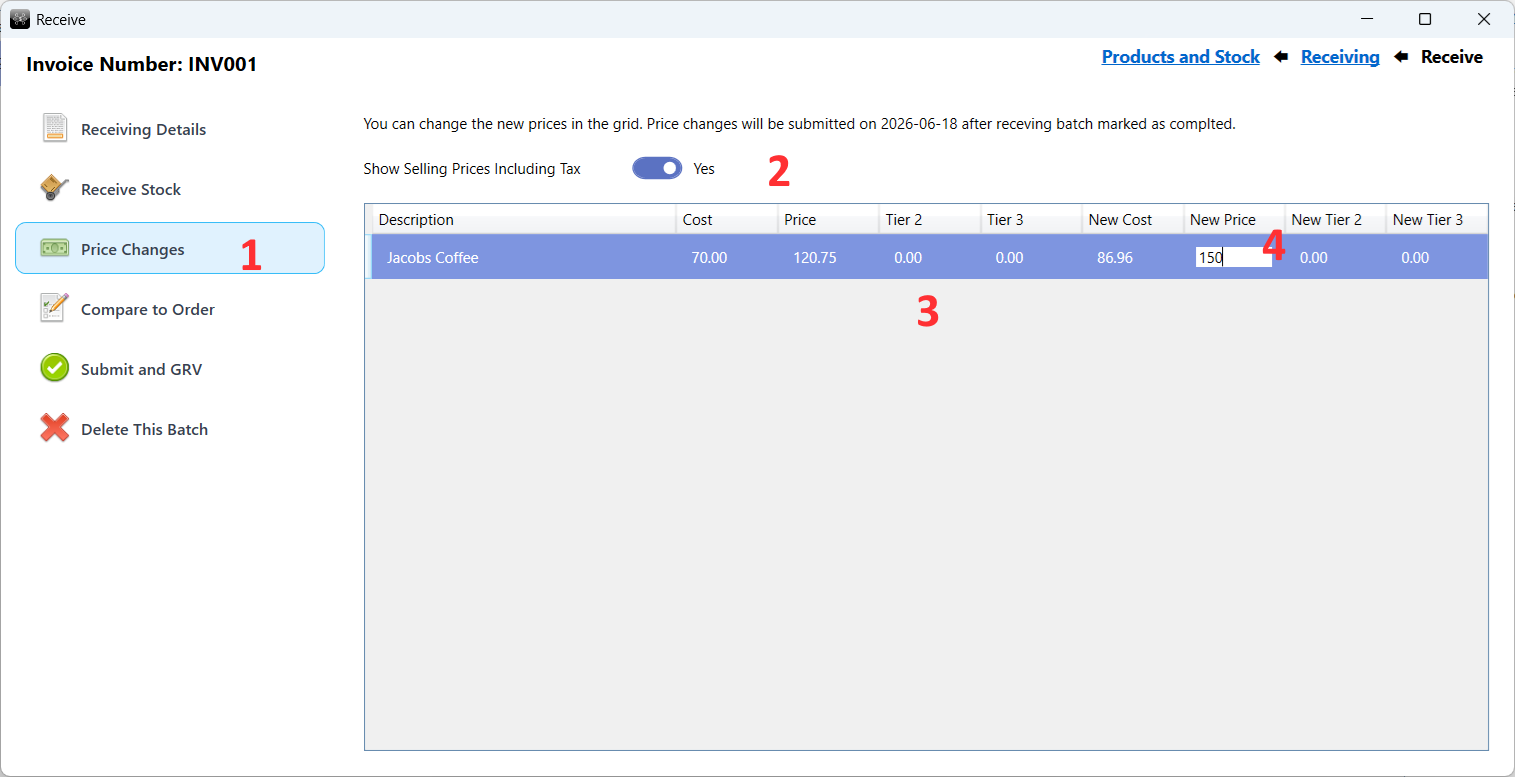
You can review and adjust the calculated costs and selling prices at any time by selecting
Price Changes from the menu on the left.
-
Select Price Changes.
-
You can choose to view and edit selling prices including or excluding sales tax.
-
The current cost and selling prices for the product will be displayed together with the newly calculated values.
-
You can edit the new cost and selling prices directly in the grid.
Note that these changes will only take effect once the receiving batch has been completed and the scheduled price change date selected for the batch has been reached.
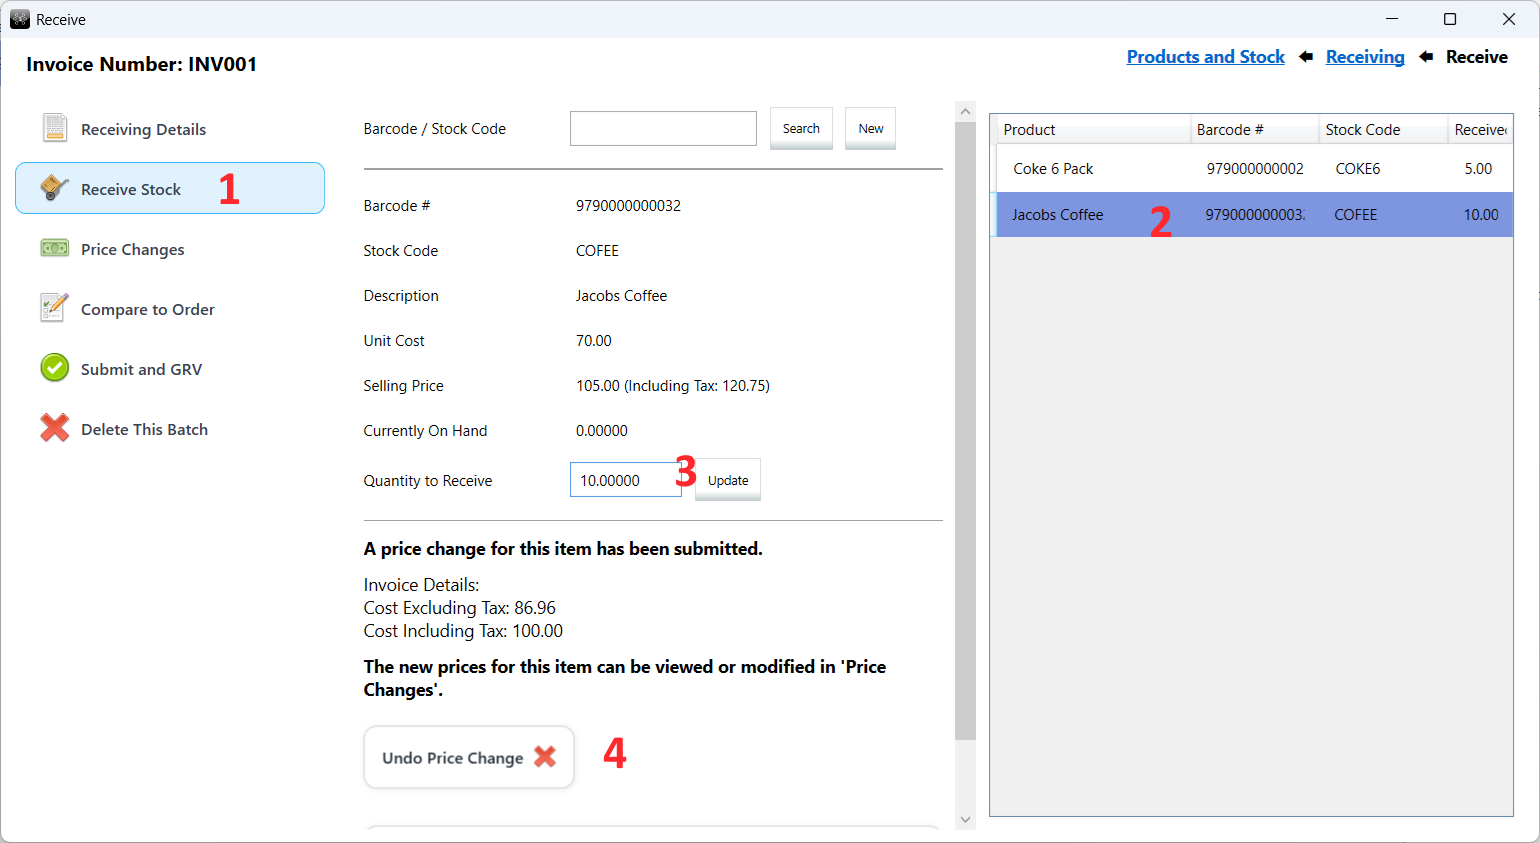
Making Changes - Correcting Mistakes
As long as the stock receiving batch has not been completed, you can still make changes and correct any mistakes before the stock is added to your inventory.
-
Go to Receive Stock.
-
Select the item you want to change from the received list.
-
Enter the correct quantity and press ENTER or click Update.
-
If a price change was submitted for the item, you can undo the price change. You can then submit a new price change if required.
GRV (GRN) and marking the batch as complete.
The received stock will not be committed to inventory unless you mark the invoice/received batch as 'Completed'.
To mark the batch as completed, or to print the GRV (Goods Received Voucher) / GRN (Goods Received Note),
go to 'Status and GRV'
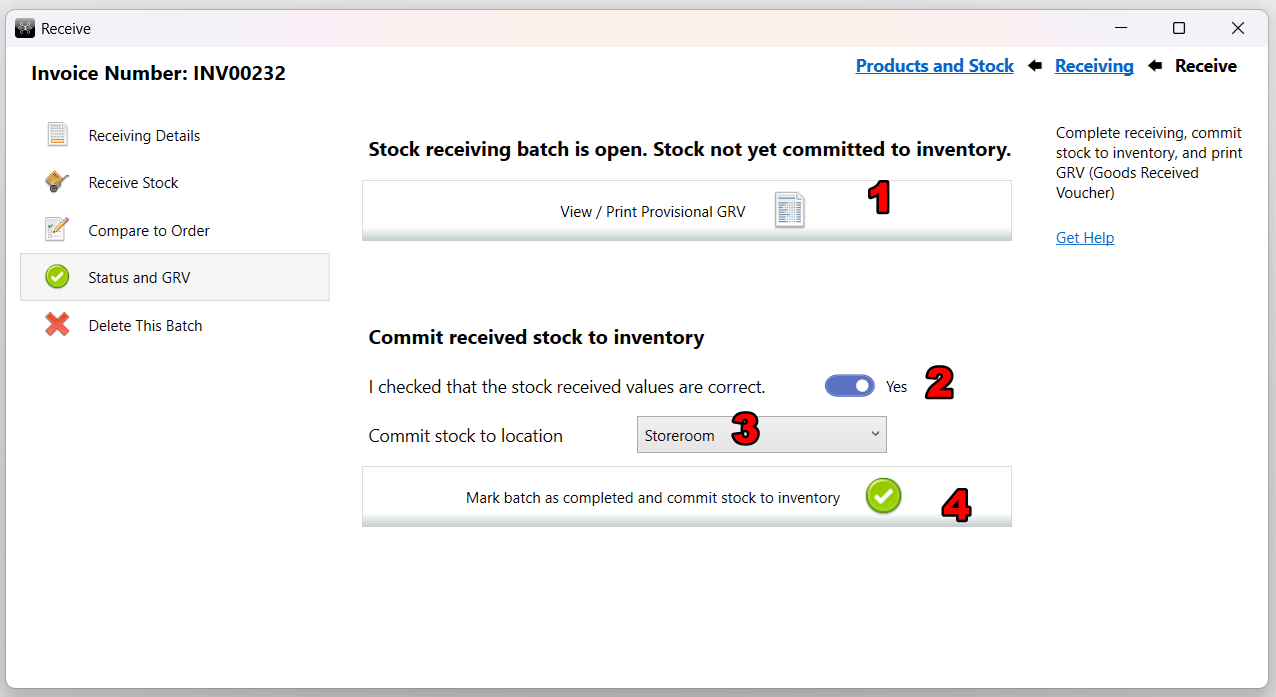
- Before you finalize the receiving batch, you can view a provisional GRV (Good Received Voucher) to compare it
with the invoice you received. You can still make changes to the stock that was received at this point.
- If you are ready to finalize the receiving batch, confirm that the batch is correct.
The confirmation step is to prevent a user from accidentally confirming the batch as completed.
- Select the stock location where the received stock needs to be allocated to.
- Click on 'Mark batch as completed'. The received stock will be committed to inventory. No more changes can be made after this step.
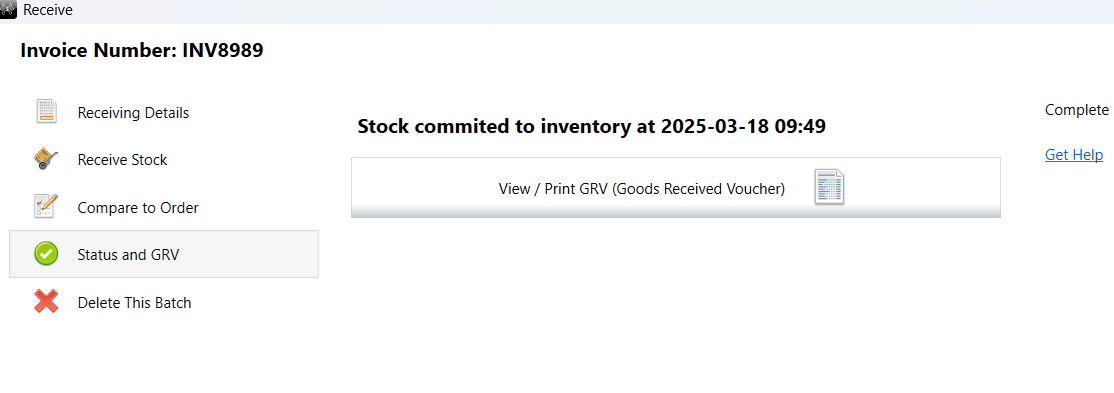
Once the batch has been finalized, the new stock will be in your inventory and you will be able to print the final GRV.