Using a Cloud SQL Server
Using a cloud server is not recommended
ROBOTILL is not designed as a cloud based system but as a client-server system using a Microsoft SQL Server on your local network.
If you choose to use a cloud server, then you might experience performance issues.
Instead, we recommend that you
allow ROBOTILL to install SQL server for you
on one of your computers.
If you choose to use a cloud server
If you choose to use a cloud server, you can follow these instructions.
The instructions are based on
Microsoft Azure
but your cloud service should have similar options.
Please note: ROBOTILL Support will not give any support with the set up of your cloud server as the option is not recommended.
Log into your Azure account, and create a SQL Database. You can use any name for the resource group, server and database.
You will also need to choose a username and password. You can choose any username and password.

The S0 pricing tier should be sufficient for most shops and restaurants. Note that the prices displayed above are in ZAR. The system will display prices in your local currency.
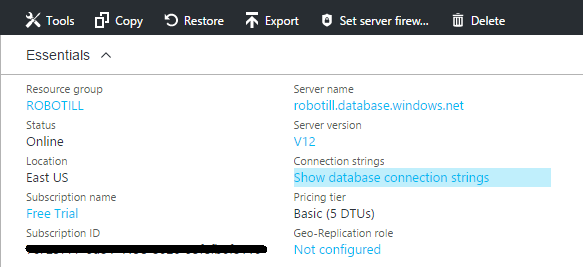
After you created the database, click on the 'Show Database Connection String' as shown below.

The following will then be displayed:

Copy this string, you will use it when running the ROBOTILL Database Connection Wizard.
That is it! You can now connect ROBOTILL to your new server.
Connecting ROBOTILL to your SQL Server in the Cloud
If you haven't installed ROBOTILL yet, you can now install it
(Download the install file from www.robotill.com).
When you open ROBOTILL Back Office, the ROBOTILL Database Setup Wizard will start.
If you already had ROBOTILL installed and you want to change to a cloud server, just start the ROBOTILL Database Setup Wizard directly (you can find it under All Apps > ROBOTILL).

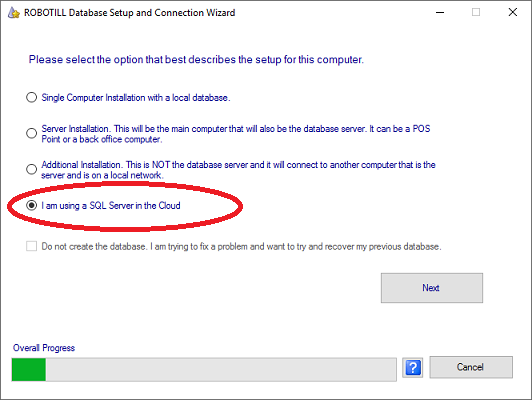
Select the 'I am using a SQL Server in the cloud' option and click Next.

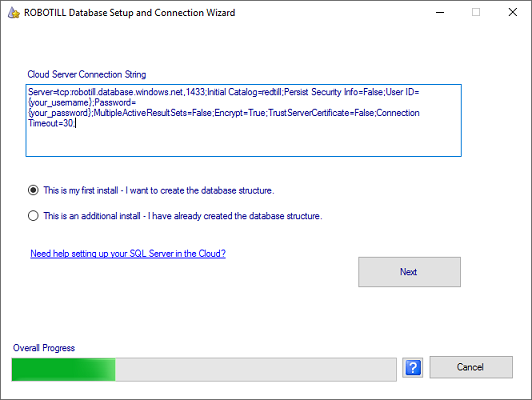
Paste the connection string you copied from the steps above into the connection string box. Replace your username and password in the string. You also need to remove the curly brackets that is placed around username and password.
The first option (This is my first install) will create the ROBOTILL database tables. The database is already created in Azure, but it is empty and ROBOTILL first needs to create the tables and set it up.
You can use the second option if you are adding an additional computer to the system and you already used the option above during a previous installation.
If you get an error that the IP address is not allowed. Go back to your Azure portal and click on the firewall option (see below).

The Azure portal will detect the current IP address and you can just add it.
Note that the backup and restore features of ROBOTILL will not work if you are using a cloud server. Your cloud service should however include a backup plan.