Modifiers
Modifiers allow you to add extra options to an order or product. They can be used for simple instructions, such as how a steak should be cooked, or for selectable extras and sides such as chips, salad, vegetables, sauces, or toppings.
When a product with modifiers linked to it is selected during a sale, the cashier or waiter will automatically be prompted to choose the required options. This helps ensure orders are captured accurately and consistently.
Modifier options can also be linked to stock items. This means the selected option can reduce stock levels and, if required, change the price of the main product. Modifiers are useful for restaurants, takeaways, coffee shops, and any business that needs flexible product options during a sale.
Creating Modifier Groups
Go to Back Office > Setup and Settings > Modifiers and click New.
For this example, we will create a modifier group called Cooking Options.
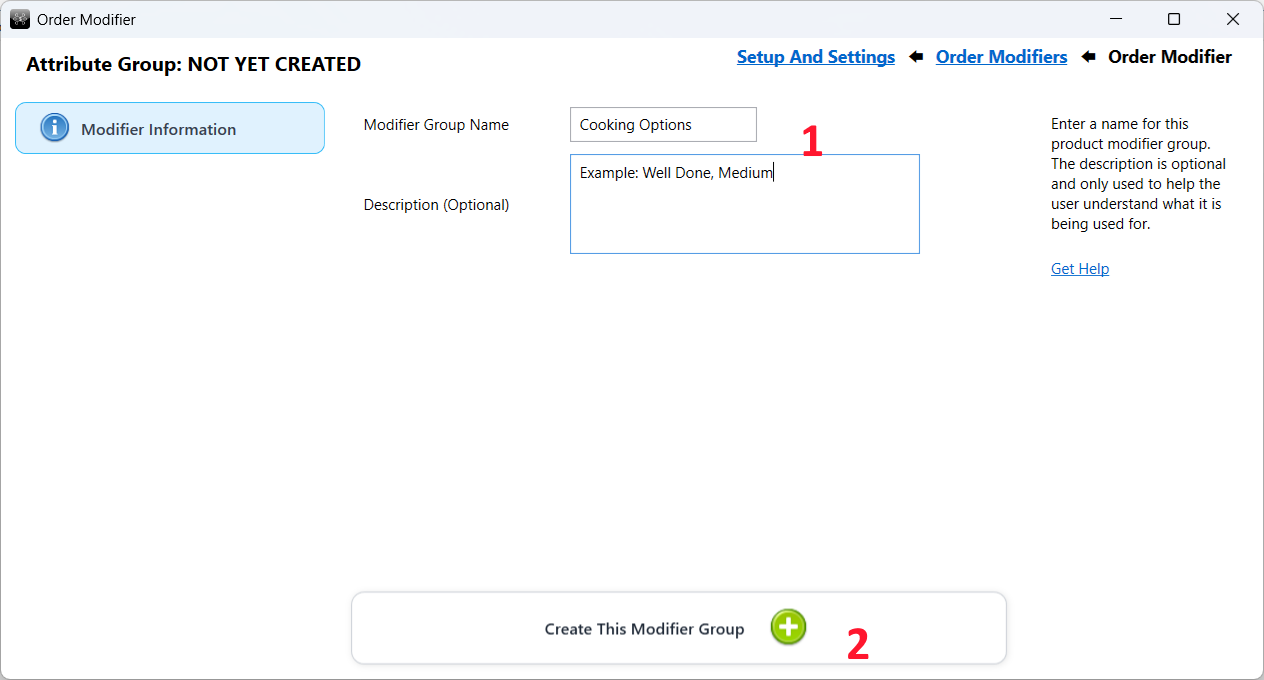
- Enter a name for the modifier group.
- The description is optional and is only used in the Back Office.
- Click Create This Modifier Group.
Creating the Modifiers
Some modifiers are actual products, such as chips, salad, or extra cheese, that affect stock levels and pricing.
Others are simply instructions, such as cooking options, that do not affect stock or pricing.
If you are using modifiers that are not actual products, you probably do not want them to appear as products that can be sold directly.
In this case, first create a category and
set it to "Hide Category at Till Point".
You can now create your modifier products.
Go to Back Office > Products and Stock > Products and create your first modifier product:
Well Done.
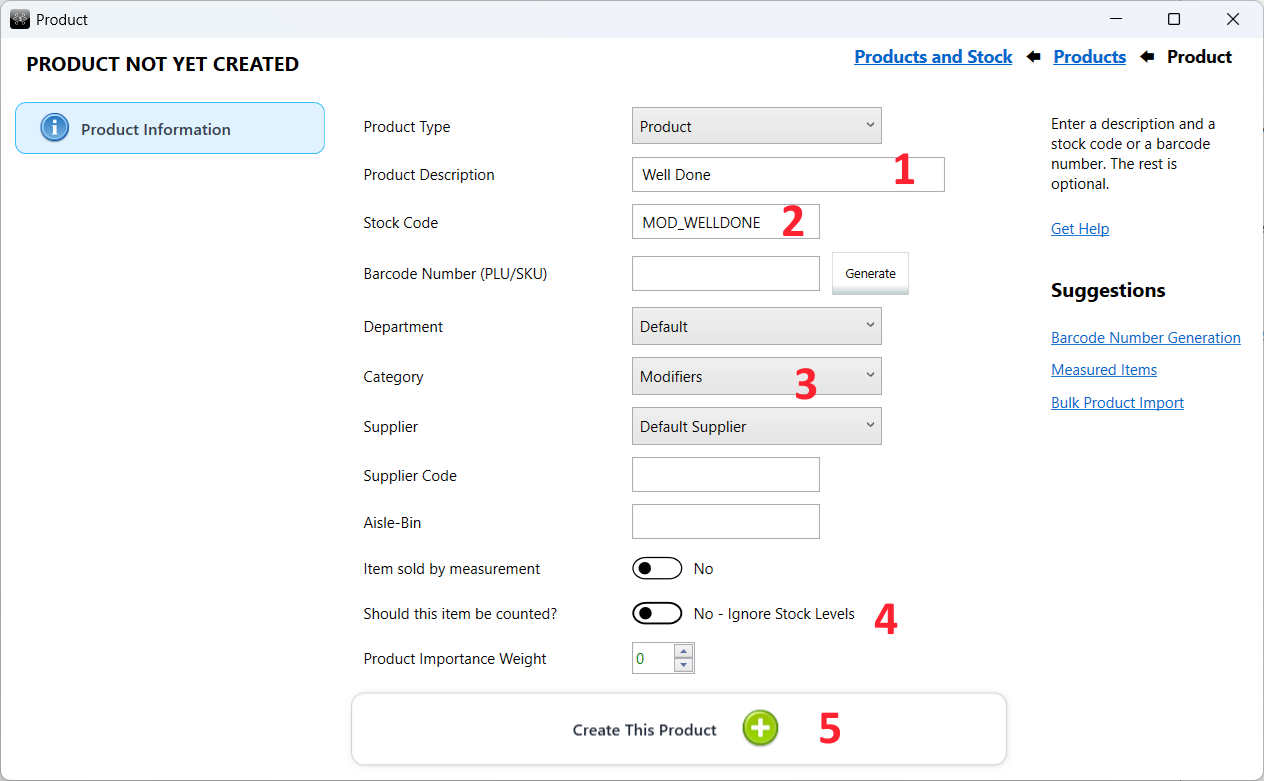
- Enter a description that will be clear to the waiter, cashier, and kitchen staff.
- Use a unique stock code. It should not be a stock code that a cashier might enter accidentally.
- Allocate the product to your hidden category (if it is not a real product that can be sold).
- Select No - Ignore Stock Levels if this modifier does not track stock.
- Click Create This Product.
Repeat these steps for the remaining options, such as Medium and Medium Rare.
Adding the Modifiers to the Group
You can now allocate your newly created modifier products to the modifier group.
Go back to the Back Office Home screen and select
Setup and Settings > Modifiers.
Open the modifier group you want to add the modifiers to.
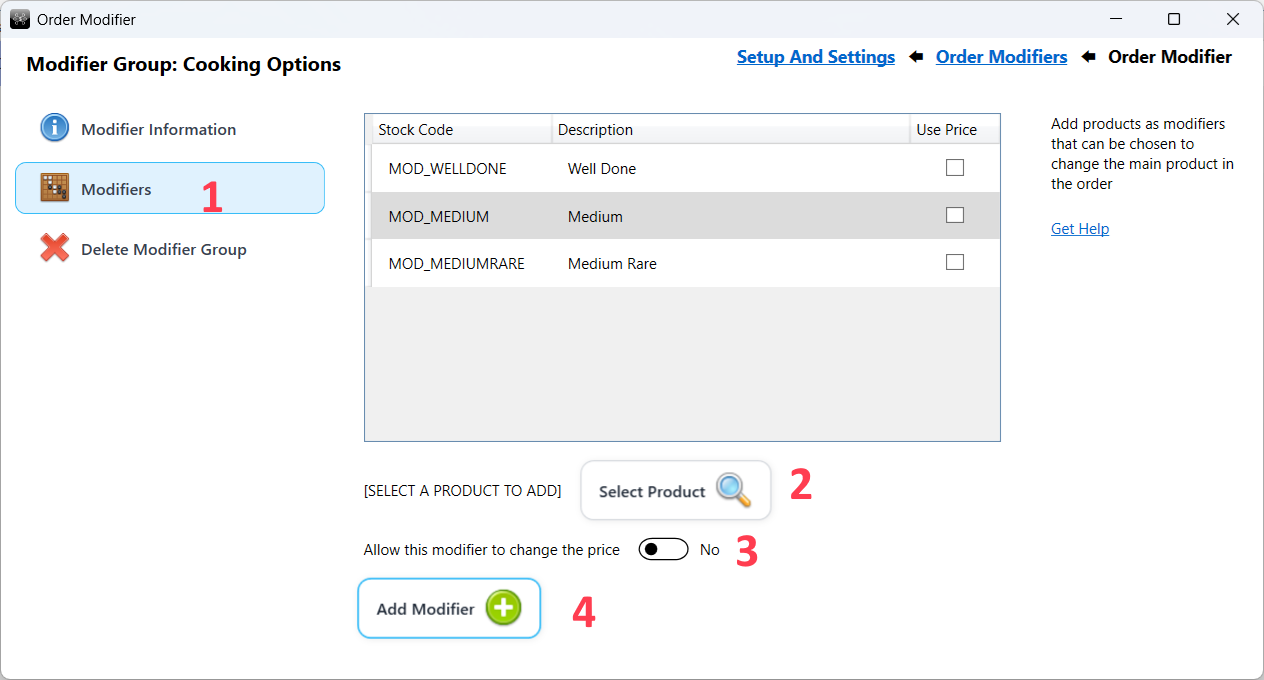
- Select Modifiers within the modifier group.
- Select the modifier product.
- If this is a product with its own selling price, choose whether the modifier price should be added to the sale.
- Click Add Modifier.
You can add additional modifier products to this group and create as many modifier groups as required.
Adding Modifier Groups to Products
You can now assign specific modifier groups to specific products.
Open the product that should use modifiers.
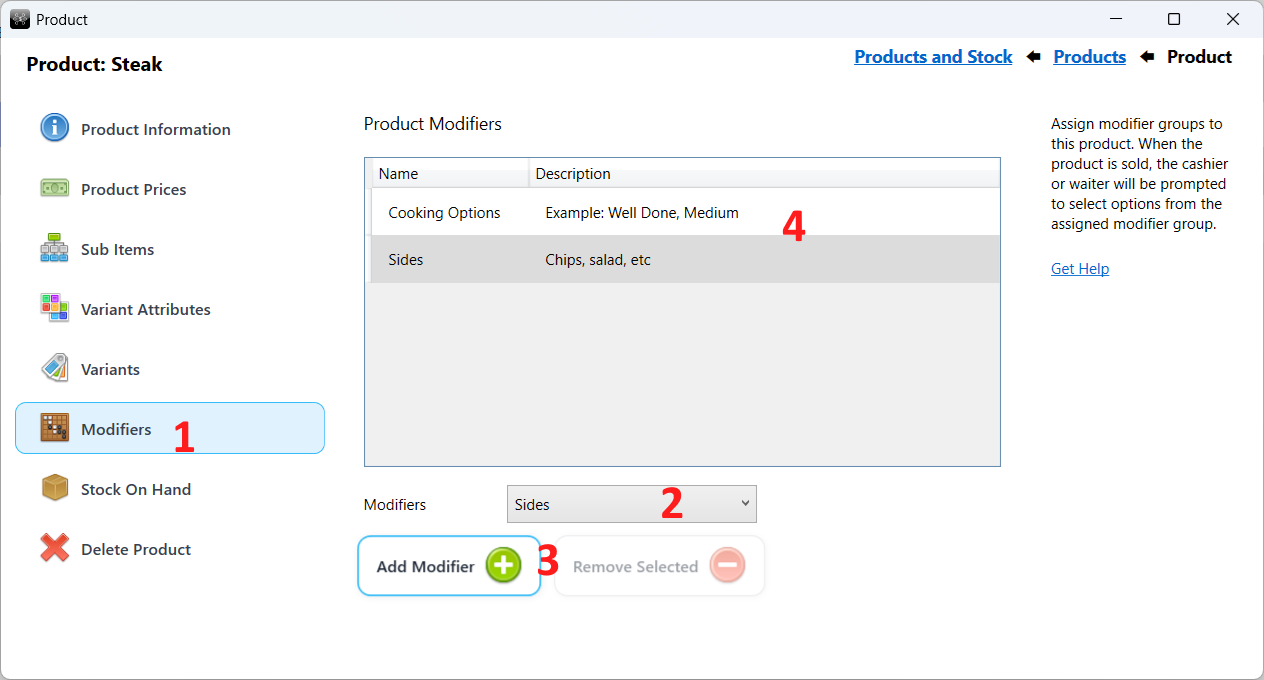
- Select Modifiers from the product menu.
- Select the modifier group you want to add.
- Click Add Modifier.
- You can assign multiple modifier groups to a product, such as Cooking Options, Sides, Extras, and Sauces.
A product can have multiple modifier groups assigned to it. For example, a steak product might have:
- Cooking Options - Well Done, Medium, Medium Rare
- Sides - Chips, Salad, Vegetables
- Sauces - Mushroom Sauce, Pepper Sauce, Cheese Sauce
How Modifiers Work at the POS
When a product with linked modifiers is selected during a sale, the waiter or cashier will be prompted to choose the required options.
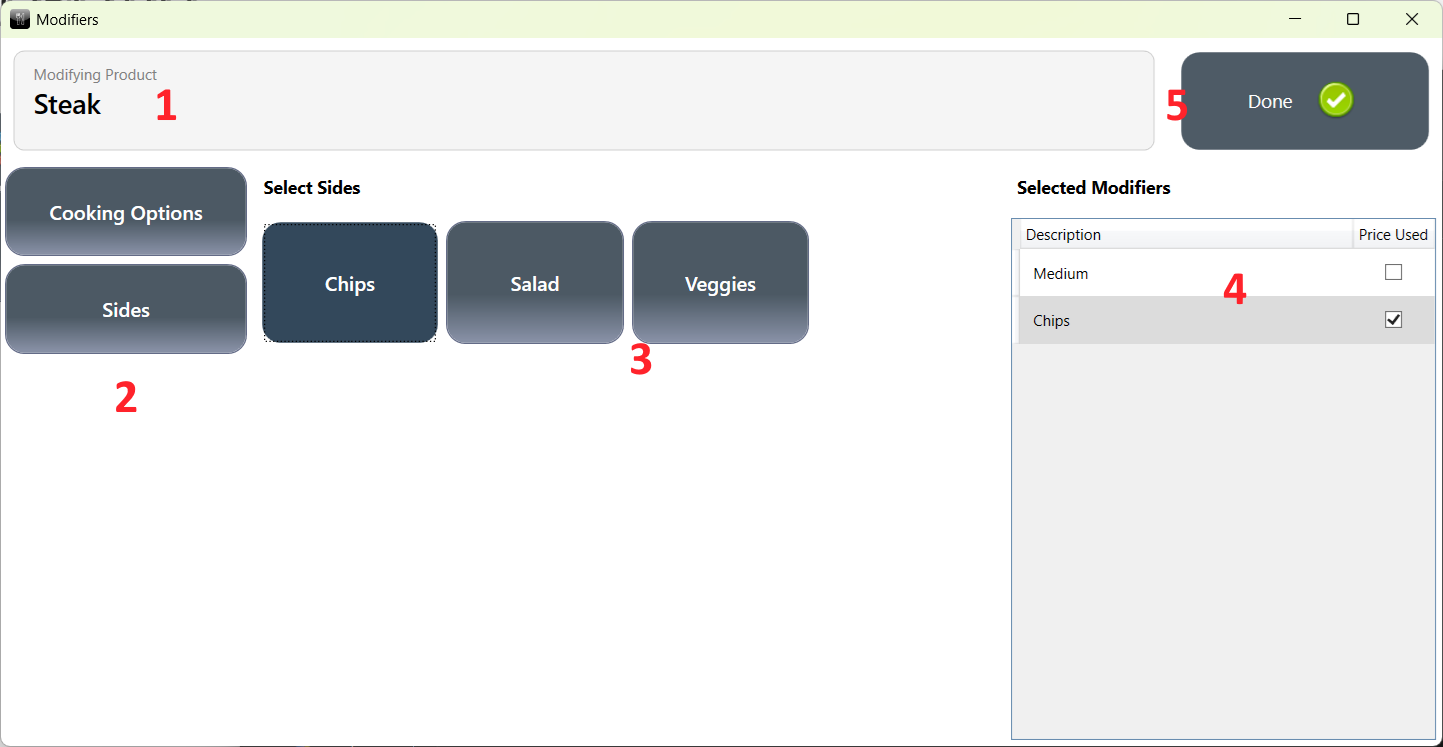
- The product being modified will be displayed.
- If multiple modifier groups are linked to the product, you can select the required group on the left.
- Select the required modifier options. You can select multiple modifiers from each group.
- The selected modifiers will be displayed on the right.
- Once you have finished selecting modifiers, click Done. If no modifiers are required, simply click Done without making any selections.
Once added to the sale, the selected modifiers will be displayed underneath the main product in the POS screen.
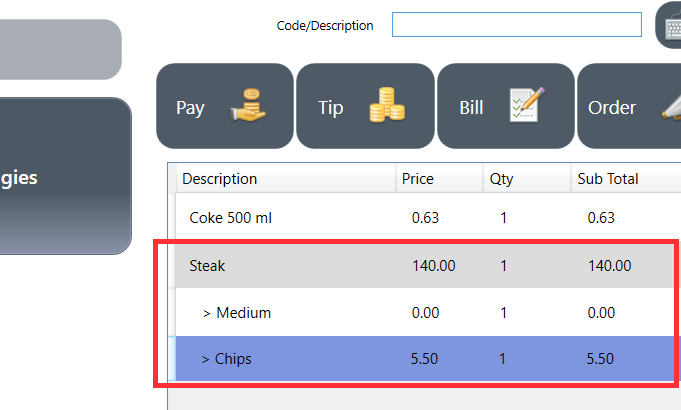
The selected modifiers will also be printed on the kitchen order slip, bill, and customer receipt.
You can choose if you do not want modifiers that do not affect the price to be printed on receipts or bills
in the Restaurant Settings.
A typical example would be cooking instructions that you do not want to appear on the customer's receipt.
You can change the quantity of a modifier. For example a Steak (main item) can have two portions of Chips (modifier).
To change the quantity, select the modifier line in the sale and choose Change Quantity from the menu.
Note that you cannot change the quantity of a modifiable item (the main product) that has modifiers linked to it.
Instead you should add another item to the sale.
To remove a modifier, select the modifier line in the sale and choose Remove Selected Item from the menu.
To add or change modifiers after a product has been added to the sale, select the main product and choose
Add Modifiers from the menu.